


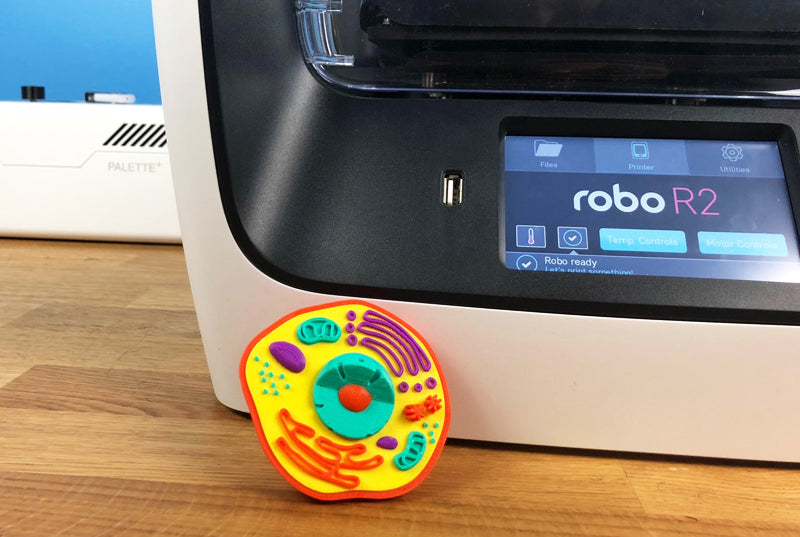
Let's have some fun with Mosaic Manufacturing's Palette+ device and the Robo R2 3D Printer
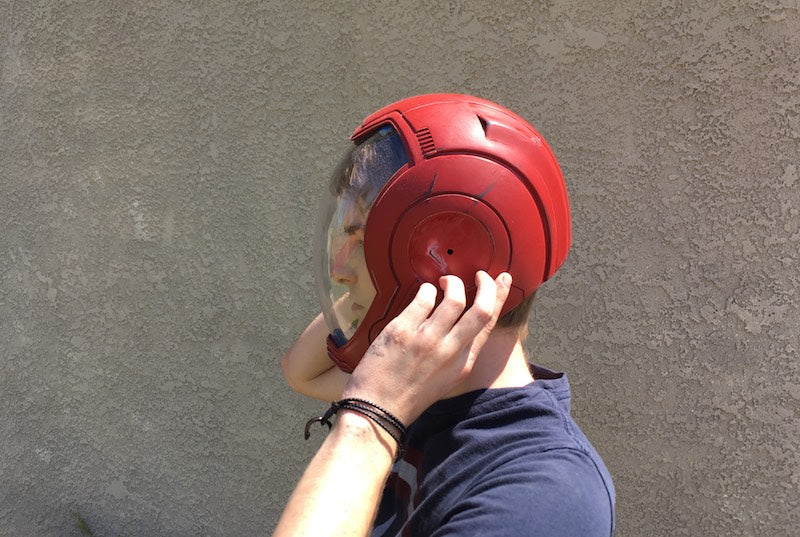
After using the Mosaic Palette+ device for several months with our Robo 3D printers, we are happy to showcase some of the magic. This device is pretty amazing in its simplicity and ability to splice together 4 different colors of PLA filament or different materials together. This post will showcase some of the things I am currently able to do with the Palette+ device as well as a simple tutorial on how to get your brand new Palette+ device setup to your Robo R2 3D Printer.
Palette+ Features
- Efficient Multi-Material Printing - Palette+ fuses together 4 filaments and feeds them into your printer through one single extruder in real time.
- Soluble, Durable, Flexible, 4 Colorful 3D printing - Print impossible overhangs with water-soluble support. Make heat and water resistant models with PETG and create functional, end-use products with flexible TPU.
- Rediscover your printer - Palette+ works with most filament based 3D printers.
Setting Up The Palette+
In this portion, we will go through the simplest process to get the Palette+ device setup for the Robo R2 3D printer. This will also translate well to the Robo C2 3D Printer.
Step 1: Positioning the Palette+, R2, and spools properly
I want to make sure that before you begin, you set up the machine in the best possible way on your desktop. If you take a look at the imagery, you will see how we set this up using everything that the Palette+ device includes in the box.
Positioning the Scroll Wheel
Positioning Palette+ next to your Robo R2
Positioning The Spools using the Palette+ Original Box
The Palette+ device includes two 3D printed side clamps and a spool holder bar for their original box that you can use to hold all of your spools for printing on your device, as shown in the picture below.
Turn off your filament detection sensor in your web dashboard or put a piece of material through your sensor so your Palette+ will work
Your Robo R2 and Robo C2 3D printers are equipped with filament detection sensors to ensure you do not run out of material and ruin a long print. For the Palette+ device, you will not be using this feature so you will need to disable it with the Octoprint web browser or activate it with a piece of filament as shown below.
Step 2: Calibrating the Palette+
Now that you have the device all set up properly, let's get to one of the most important parts of this journey into multi-color 3D printing — calibrating the Palette+. Here is what you need to do to ensure you have the proper calibration with the Robo R2 3D Printer.
Download the Chroma Software from Mosaic Manufacturing for use with the Palette+
Click here to go to download link
Go through the steps for calibrating in the Chroma software
Follow the steps after you download the software/calibration file for setting up the Robo R2 3D Printer with your Palette+ device. They walk you through each and every step. The MOST IMPORTANT step of this is to ensure you stop the calibration process as soon as you see the filament color change. How I did this was after I loaded the filament into the extruder in the setup process, I heated up the extruder and used the motor controls on the Robo R2 3D Printer to extrude a small amount of filament (1mm) at a time until I saw the color change. Then, I stopped. See image below.
Download and print the calibration file below
Calibration file for the calibration process: Download
You must print this without any issues. Keep in mind, you should have your Z-Offset already set on your Robo 3D printer. Make sure to look at the input values after the calibration file is printed and input those values into the Chroma software. Then, your machine is calibrated successfully! Congrats! On to the next step...
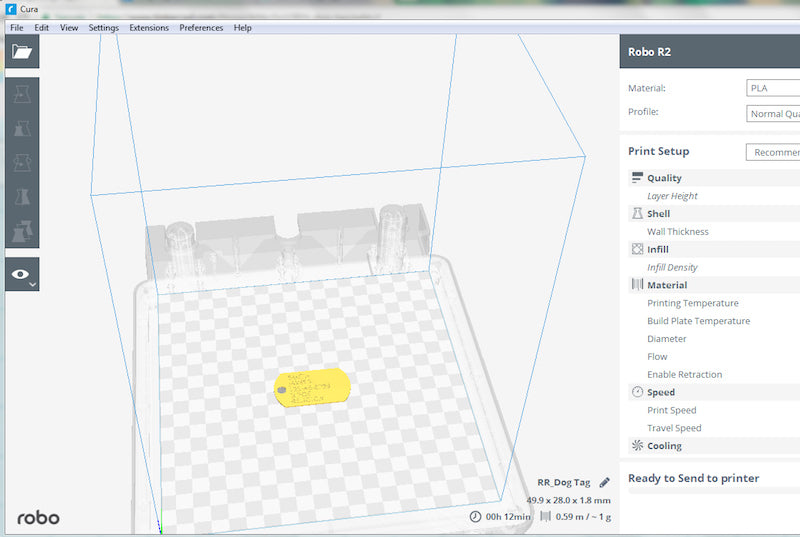
Step 3: Slicing with Simplify3D and your Robo R2 3D Printer
Once you have the Palette+ calibrated to your Robo R2 3D printer, you will have to get files sliced for the Palette+ device.
Download the Robo R2 Factory File for your Palette+
Follow the video instructions below to Slice with Simplify 3D to get GCode you can take into Chroma and get your final files
Step 4: Taking GCode into Chroma and getting files onto Palette+ and Robo R2
Now that you have sliced a model in Simplify3D, you can take this GCode into the Chroma software. Chroma will process the model and then showcase it on the platform for you to visualize. You can choose which color you would like for which part of the print. Then, the Palette+ device will instruct you, when starting the print, which numbered hole goes with which color.
When you press "SAVE FOR PRINTER" in the top right, you will get two models: a .msf and a .msf.gcode. Save the .MSF file to your Palette+ Device SD Card and plug it in. Then, save the .msf.gcode to a USB drive and plug it into your Robo R2 3D printer.
Step 5: Start Multi-Color print on Palette+ Device first
Make sure the tube is not plugged into the extruder just yet. You will have to manually push the magnet as instructed on the Palette+ until you see the material coming out of the end of the tube. The Palette+ device will instruct you how many more MM to feed until it is good to go. Follow it until you get to 0mm left and push the knob on the Palette+ down to finish feeding. Then, insert the material and the tube into the top of the Robo R2 3D Printer. I like to push the material as far down as I can until I know it is ready for extrusion. That way, when I start the print, I know material will be extruding and the Palette+ calibration will not be thrown off.
Step 6: Plug in USB drive into Robo R2 and choose .msf.gcode file
Press print, make sure that the extrusion is happening and watch the Palette+ splice and carry out the magic of multi-color, multi-material 3D printing!!
Check it out:
Multi-Color Files for 3D printing
Go to Mosaic Manufacturing's Thingiverse page to find over 116 different multi-color designs: https://www.thingiverse.com/MosaicManufacturing/designs
Setup Video
How to turn 1 STL model into 4 STLs for Multi-Color & Multi-Material 3D Printing with Meshmixer
Timelapses Galore!

Bill Snyder
May 09, 2018
does printing with this mean it has to print a purge tower? which of course wastes filament.
Robo Team
May 09, 2018
Hi Bill,
Yes, that would mean it will have to print a purge tower. Mosaic is currently working on a solution to handle this issue.
Best,
Robo Team