Here in the US, Memorial Day may signal the unofficial start of summer, but it’s also important to
remember the true meaning of the holiday; to honor the brave men and women of the armed forces
who perished in service of their country.
This year, we here at Robo have decided to honor those we’ve lost by printing some commemorative
dog tags. If there’s a soldier in your life that you’d like to commemorate, feel free to follow this handy
guide to create customized dog tags.
Begin by downloading a blank dog tag file. We found a great one on Thingiverse that was designed by
elmwolf. You can download it here.
Once the file has been downloaded, you’ll want to import it into the design software of your choice so
that the file can be customized. We’ve chosen to use Tinkercad for this tutorial. Tinkercad is a free, web-based design program (no software to download or install!) that you can use to quickly customize your dog
tags. Simply visit www.tinkercad.com and sign up for a free account to get started.
After signing in to Tinkercad, you’ll next want to import the blank dog tag file. Click the import link in the upper right hand corner of your screen and select the blank dog tag file to import it into Tinkercad. Tinkercad gives every new project a default title, so feel free to click the default name in the upper left-hand corner to change the name of the file to anything you wish.
Once the dog tag file has been imported into the work area, it’s time to customize it.
Select the text tool on the right-hand side of the screen, then click anywhere in the work area to place a block of text that reads “text”. After placing the text, use the window that pops up to customize the text. The format of a US Army dog tag looks something like this…
LAST NAME
FIRST NAME, MI
SERIAL NUMBER
BLOOD TYPE
RELIGIOUS AFFILIATION
…so we’ll place the individual lines of text one at a time. In our example, we’ve started from the top
with the last name. After typing the last name you are also able to choose the font. The “sans” font in
Tinkercad is most similar to the font used on official dog tags, so we went with that.
Once we have the text looking the way we want, we’ll next want to place it onto the dog tag.
Use the controls in Tinkercad to shrink the text down to an appropriate size, then drag it into place on
the dog tag. You can learn more about how to use the controls in Tinkercad by clicking the following link and taking a quick lesson.
With that done, you’ll just want to repeat the previous steps to create the rest of the text and place it
onto the dog tag.
After you have finished customizing your dog tag, click the “Export” button in the upper right hand
corner (see photo above) and a menu will pop up. Save your file in the .STL file format by clicking the
.STL button in the export menu, and your completed dog tag file will automatically download to your
computer.
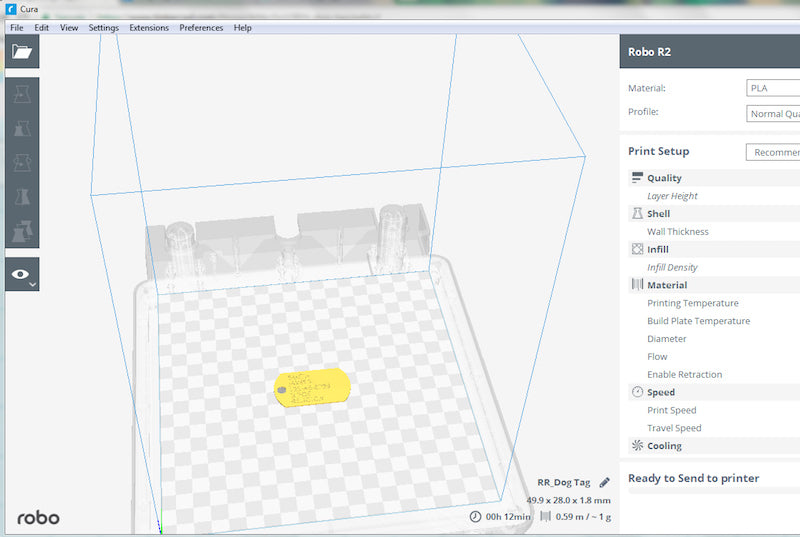
Now, it’s time to prepare the file for 3D printing. Feel free to open Cura for Robo (or whichever program you typically use to convert your .STL files for 3D printing) and import your newly created dog tag file.
If you’d like to make multiple copies of the same dog tag, hover your mouse over the dog tag and right click to bring up an options menu.
After selecting the “Multiply Model” option, you can type in the number of copies you would like to
make.
Finally, click and drag the dog tags around the virtual print surface to arrange them how you like, and
choose your printing options from the menu on the right-hand side of the screen. The dog tags will be
flat on the bottom and totally self-supporting, so you shouldn’t need to enable supports of any kind.
Also, since the dog tags are relatively thin and won’t take long to print, consider selecting 100% infill so that they will print solid and be more durable.
From there you need only save the file to a removable thumb drive or send it directly to your Robo 3D
printer using the controls in Cura for Robo and you’ll be all set to print your commemorative dog tags.
We want to wish everyone a safe and happy Memorial Day weekend, and our warmest wishes to all of
our brave servicemen and servicewomen.
Written by Nick Loiacano