

Desktop Software |
Web Browser |
Mobile App |
Touchscreen |
|
|---|---|---|---|---|
| Connectivity requirements | Wi-Fi or printer hotspot | Wi-Fi or printer hotspot | Wi-Fi or printer hotspot | None |
| Slicing capabilities | ✔ | ✔ | ✔ | ✔ |
| Preview print files | ✔ | |||
| Transfer files to printer | Wi-Fi or USB Drive | Wi-Fi or printer hotspot | Wi-Fi or printer hotspot | USB drive |
| Printer controls | ✔ | ✔ | ✔ | ✔ |
| Printer terminal | ✔ | ✔ |
Access Denied
IMPORTANT! If you’re a store owner, please make sure you have Customer accounts enabled in your Store Admin, as you have customer based locks set up with EasyLockdown app. Enable Customer Accounts
Quick Start Guide
Welcome to the Robo family!
We're thrilled you're here and want to extend a big thank you for choosing Robo!
Whether you’re making projects for school, work, or home, this is the tool engineered to help you unlock the limitless possibilities of your creative potential.
So, go ahead. Make and be proud. Make the amazing. Make it all happen - now.
Make the imagined.
Safety and Compliance
Find out more at robo3d.com/safetyinformation
Besides your new Robo C2, you will find the following in the box:
- Quick Start Guide
- Autodesk Fusion 360 design software (1 year free)
- Test Print from production line
- 10 Spare Bed Sheets (1 BuildTak sheet already applied to your print bed)
- Robo Stickers
- 19V Power Supply
- Filament Feed Tube
- 2 Filament Spool Holders
- Toolbox with Extruder Face Plate cover, 3 Allen Wrenches, Tweezers, Lubricant, Stylus, and Z-Offset Tool
- Robo USB Drive
- 250g Robo Filament
- Spatula

Now that you’ve received your Robo C2, it’s time to unbox it and get familiar with your printer and accessories.
Your C2 is housed in 3 styrofoam pieces, secured together by a nylon strap. Simply lift the printer from the box using the strap and set it down.

Unclip the black nylon strap and remove the two halves of the top styrofoam shell.

Finally, using the handholds on the bottom of your C2, lift the printer out of the bottom styrofoam piece.

Tip: Save your printer box, nylon strap, foam inserts, and inclusions box for transportation. Also, may you need to exercise your warranty or ship your printer in the future, you will need the original packaging.
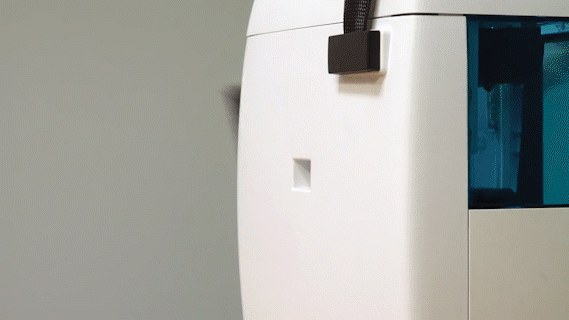
The printer’s accessories are stored in the blue accessories box inside the printer. Simply slide the accessories box out and be sure to remove the foam.

Now, we are ready to take off the additional shipping material and zip ties. There are 4 orange rod holders that need to be taken off. Simply use your thumb to push over the clip and it will come off. There is one at each corner of the top gantry.

Next, remove the zip ties securing the rods to their plastic brackets.

Now let’s move forward with your initial set-up of Robo C2.
Inside the toolbox, you will find the Extruder Face Plate cover. Go ahead and take that out and place it over the Extruder Face Plate. It is held in with magnets so it will just pop right in.
From here you’ll want to connect the Power Supply with the cable to the designated area on the back of the printer and then plug it into an AC outlet.
Now, go ahead and turn on the Power Switch to power on your printer.
It is necessary to connect Robo C2 to Wi-Fi in order to update your printer software and to print from the Robo App, web dashboard or Chromebook.
Note: You may also connect to your network using an Ethernet cable.
To begin connecting to your Wi-Fi network, select UTILITIES on touchscreen.

Select NETWORK.

Select CONFIGURE WIFI.

Then, select your Wi-Fi network and use the on-screen keyboard to enter your password.

Once you’re done, select CONNECT.

NOTE: R2 Screen is pictured, but the steps are the same for both C2 and R2.
Select UTILITIES. Then, select UPDATE.

Update to the latest version and wait about a minute for the installation to complete and restart. If your Robo C2 is already up-to-date, the button will be greyed out and say UP-TO-DATE.

Note: Following this process regularly is the best way to confirm your machine is operating with the most recent advancements and functionalities available.
You will need to calibrate your Z-Offset the first time you start printing. Ensure your extruder nozzle is clean prior to starting calibration.
Navigate to the Z-Offset wizard on the touchscreen under UTILITIES > WIZARDS > Z-Offset Wizard.

The Z-Offset Wizard sets the print bed height when printing. Select START and then the print bed will raise and the extruder will move to the front left position.

Once your printer has finished preparing, you will use the included Z-Offset tool (or a standard sheet of paper) for the next few steps of the wizard.
Slide the Z-Offset tool back and forth between the extruder nozzle and print bed. Tap the Z+ up arrow and/or Z- down arrow until the extruder nozzle lightly touches the top of the Z-Offset tool.

NOTE: If it feels like the Extruder Nozzle is digging into the Z-Offset tool, the print bed is too high. So, press the Z- down arrow until you feel only slight resistance when sliding the Z-Offset tool under the extruder nozzle.

First, insert the filament spool holder into the rear slot of the printer. Make sure the taller tab is inserted first and that it is completely inside the printer until you see the taller end on the inside of the printer.
Next, insert the filament feed tube into the outermost hole in the filament sensor block, and then insert it into the extruder.
Cut at least 30cm of filament before hanging filament spool on the spool holder with the loose end facing counter-clockwise. Thread the loose end through the bottom base of the filament sensor block and out the filament hole through the filament feed tube.

Continue feeding the filament through the filament feed tube until it reaches the extruder. Then, press the extruder lever arm down and feed the filament into the printer’s gears.

Now, select utilities on the touchscreen.

Then, select WIZARDS.

Next, select FILAMENT LOAD to start the wizard.

The on-screen prompts will guide you through the rest of the steps.
When prompted on touchscreen, take the end of the filament and insert it through the filament feed hole at the top of the extruder until it is grabbed by the gears. Push the filament feed tube down to cover the exposed filament.

The filament drive gear should pull the filament down into the extruder nozzle and it will extrude out the other end. Once you see this, press NEXT on the screen, then press DONE. Use the tweezers to remove the excess filament from the end of the nozzle.
To create your first test print, select FILES on the touchscreen. Then, select LOCAL STORAGE. Now, select any file to test print.

Select START to begin printing. Printer will go through automatic leveling sequence, then file will begin printing. Select PAUSE to pause your print or CANCEL to cancel your print at any time.
When the test print is complete, remove the print bed with the finished print still in place by lifting the bed up. Flex the print bed from several positions to help loosen the print. Your print should easily remove from the print bed.

If the print is too difficult to remove, carefully use the spatula to gently pry it free.
Note: Do not force print removal by lifting directly upward. Instead, remove it at an angle by lifting from one of its corners.
Prepare files and start prints using any of these custom Robo software options.
Learn more at: robo3d.com/software
Learn more at: robo3d.com/software
Check out these awesome online resources!
Sign up for the Robo newsletter for our latest news and updates.
robo3d.com
robo3d.com
Join the Robo community for more tips, tricks and in-depth discussions.
community.robo3d.com
community.robo3d.com
Access 3D printed STEM curriculum for K-12 classrooms.
mystemkits.com
mystemkits.com
Share everything you make
Connect with @robo3d #robo3d and show the world what you're up to!


Troubleshooting
For troubleshooting help, please click here.
Invalid password
Enter