


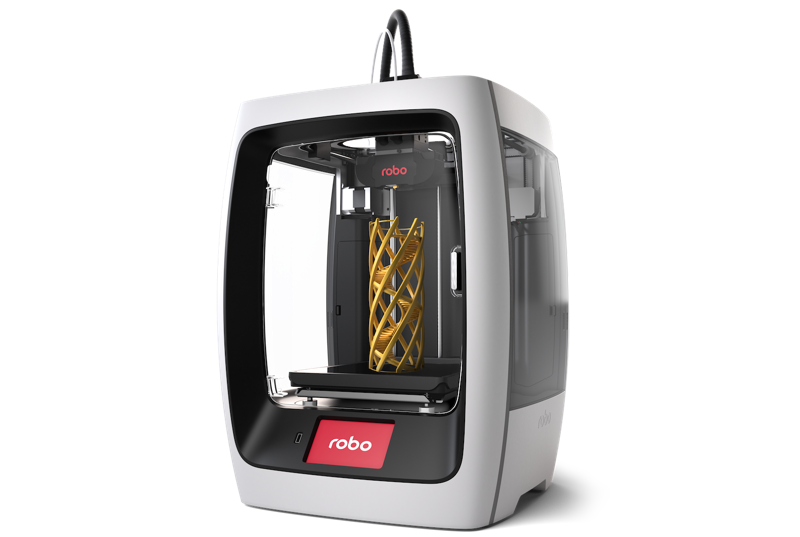
Whether you’re a 3D printing expert or just getting started, it’s always a good idea to familiarize yourself with the individual parts that make up your 3D printer! Knowing the names of the important components and what they do will help you to better understand the process of 3D printing and will assist you with troubleshooting should you encounter any issues. In this post, we’ll examine the Robo R2. Let’s start by taking a look at the front of the printer.
Interactive touchscreen
Without a doubt, this is the part of the Robo R2 that you will interact with the most! The Robo R2’s interactive touchscreen is used to initiate and control most of the functions of the R2. Everything from calibrating your print surface to running your print jobs can be initiated through this handy touchscreen! The touchscreen also is responsible for storing and organizing files. You can store up to 5gb of file content (close to 500 3D models) on your Robo R2 3D printer and you also have the ability to organize these models into separate folders by category or by project! The screen can even be used to control the R2’s onboard slicer. Away from your computer and need to get a job running? Just load your files on to a USB stick, plug it into the printer, and use the screen to prepare your files for printing! Finally, the Robo R2 has a built-in hotspot for direct wireless printing when not connected to Wi-Fi. No internet connectivity in your makerspace? Use your mobile device as a hotspot and use the touchscreen to connect your R2 to the signal so you can keep printing wirelessly!
USB Port
The Robo R2 features a conveniently located USB port right on the front panel of the printer. No need to turn the printer around for USB access, and your .STL or .GCODE 3D files load to your R2’s memory in seconds!
Filament feed tube
Pretty self-explanatory, but it’s worth noting that the filament feed tube on your Robo R2 is accessible from any angle and easily replaceable should yours become lost or damaged.
Print surface
The large (8 x 8 x 10 inches - 203.2 x 203.2 x 254 mm) removable print surface on the Robo R2 ensures that you can print flawlessly with just about any kind of filament you can imagine! PLA, ABS, and a whole host of exotic and hybrid filaments stick well to the heated surface, which comes equipped with a replaceable sheet of high-quality BuildTak™ print surface material. In short, the print surface on the R2 is one of the most versatile and capable 3D printer build surfaces available today!
On-board camera
The Robo R2 printer comes with an integrated camera so you can monitor your prints remotely via your mobile device using our free Robo App. Keep an eye on your print jobs from anywhere you happen to be, or use the camera’s time-lapse function to record a video of your print being made!
Now that we’ve looked at the front of the printer, let’s take a look at the back of the Robo R2.
Power switch
Another easy one! The power switch on your Robo R2 turns the printer on and off. When you’re ready to turn your printer off, always remember to use the “shut down” feature by clicking Utilities > System > Shut Down on your R2’s interactive touchscreen. Once the touchscreen goes dark, you’re all set to power off your R2. This will ensure that your R2 shuts down properly.
Power in
This port is where you plug in your R2’s AC adapter. Make sure that the power switch is in the “off” position any time that you plug the AC adapter in to this port.
Serial name
Your R2’s serial name will help you to identify your printer when you set it up on your WiFi network. Not only that, but it’s also used to register your printer for warranty purposes. Fun fact: each Robo 3D printer’s serial name features the name of a famous scientist or inventor! After all, where would we be without remembering the great minds that paved the way for incredible technology to emerge. Pretty cool, huh?
Auxiliary port
This port has no current functionality, but it may be used with future hardware updates to the system. We’ll let you know!
Ethernet port
If you have spotty WiFi where you live or work, the R2 features an Ethernet port so that you can connect your printer directly to your modem using an Ethernet cable.
USB port
For your convenience, there’s another USB port on the back of the R2! It has the same functionality of the USB port on the front of the R2, so feel free to use whichever one you choose.
Expanding our view of the back just a bit, we see some additional features.
Filament spool holders
We put two sturdy, hinged filament spool holders on the back of the R2! Simply tap on the upper portion of the filament spool holders (on the recessed, circular divots) to open them up or push them back in once you’re done and they’ll click back into place. Their unique design makes them sit flush with the back of the R2 when not in use, thus maintaining your printer’s sleek profile.
Filament sensor block
If by chance you should run out of filament during a print, this component will sense the situation and pause the print job. From there you can reload a fresh spool of filament and continue the job from the point at which it stopped. Smart! Tip: when your R2 is fitted with only one extruder nozzle, make sure to feed your filament through the hole in the filament sensor block that is closest to the edge of the R2. In other words, if you are facing the BACK of the R2, you’ll want to push your filament up through the hole on the right-hand side of the filament sensor block.
Now, let’s take a closer look at the extruder mechanism of the Robo R2.
Filament release button
You really won’t need to use this little feature very often at all, but if you should ever encounter a situation where your filament gets stuck inside the extruder of your R2, simply press down on this button to loosen the R2’s grip on your filament for easier removal.
Filament feed holes
The expandable nature of the R2 means that another extruder nozzle can be attached for dual extrusion! Print with two colors on the same job, or use a soluble support filament that can be washed away leaving your prints clean and saving you the trouble of removing support structures manually. Tip: when your R2 is fitted with only one extruder nozzle, make sure to feed your filament through filament feed hole #1, as seen in the photo above.
Extruder nozzle
This is where the magic happens! Well, to be a bit more technical, this is the component that the melted filament extrudes from. The Robo R2 was designed to print using a wide variety of materials including PLA, ABS, and various other hybrid and exotic filaments, and your R2’s extruder nozzle was built to handle them all! This part is available in both standard and ruby tipped varieties, with the ruby tip being great for printing with abrasive filaments such as carbon fiber infused PLA or stainless steel infused PLA.
Finally, let’s take a look “under the hood” of your Robo R2!
Raspberry Pi computer
The Raspberry Pi is a microcomputer that controls the on-board slicing functionality of the R2. In addition to that, it also controls the interactive touchscreen and communicates with your local network, giving you full access to your printer over your network connection. Its small form factor and surprising amount of computing power control the features that make your R2 one of the most elegant and capable printers available today!
Circuit board
At the end of the day, 3D printers like the Robo R2 are actually specialized robots that have to perform specific actions and move in specific ways in order to give you the highest quality prints. The circuit board on the R2 is the “brains” of the operation - telling all of the R2’s individual components what to do and when to do them - and has been specially designed to be electronically safe, remain cool, and have very low radiated electronic emissions. We've also made it easy to identify the components of the board for easy and safe connection.
And there we have it! The Robo R2 is a sophisticated device designed from the ground up to be both powerful and easy-to-use. We worked hard to make operation of the R2 intuitive so that you can focus on bringing your creativity to life! If you have any questions about your R2, please don’t hesitate to get in touch, and make sure to share your creations with us on social media with the hashtag #Robo3D!
Written by Nick Loiacano