3D Print Coral Reefs with Sam Suchin of Hope3D

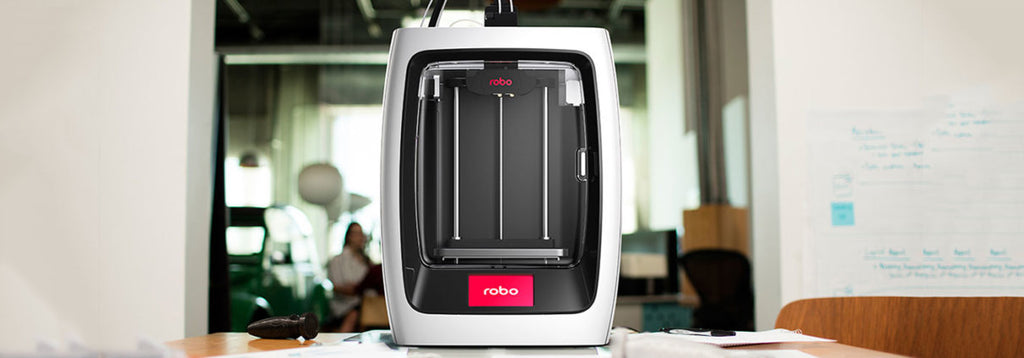
Learn more about what it took to build the Robo R2 high-performance 3D printer with Wi-Fi
When Coby Kabili and I teamed up in 2012 to develop Robo, we knew that we wanted to change the world with 3D printing. And we soon discovered how powerful and beneficial this technology could be for everyone, especially after Coby printed a prosthetic leg using an industrial 3D printer for his senior design project in mechanical engineering.
It inspired us to build a homemade 3D printer of our own, giving us a platform to successfully launch our company on Kickstarter. Now we have makers using our printers in over 4,500 cities in 98 countries — and seeing it all come together like this has been a truly amazing experience.

In that time, we’ve been asked many questions about our processes at Robo, but one really stands out:
What does it take to build a 3D printer from scratch?
I want to take some time to answer these questions, specifically in regards to our new Robo R2 high-performance 3D printer with Wi-Fi since we’re at the finish line with delivery right around the corner.
It’s important to know that we’ve been working on this project for 2.5 years and talking about it since those R1 days. Constantly going over what to name it, creating design concepts, making CAD models and building functional prototypes, etc. It’s been a long process to say the least, one that’s tested our patience many times along the way. But as we always like to say, “Embrace the suck.” Because at the end of the day, we couldn’t be more proud of where we are as a company, and know that years from now we’ll look back and be grateful for these days.
To say that we’re excited we’ve arrived to this point, going so far as to partner with the largest contract manufacturer in the world, Foxconn, is an understatement. And like all great things, it’s all about the journey.
That all being said, I wanted to get granular so I went over to our engineering department and asked Allen, our lead engineer, about the design and production process for the Robo R2. Let’s hear what he had to say:
What is a rough estimate of time spent designing and developing Robo R2?
Allen: “It took a team of four people dedicating nearly 60% of their time after we finalized the design direction over the last year, which equates to more than 5,000 hours of development.”
How many pieces are in Robo R2?
Allen: “We have 417 components that have gone into Robo R2, comprised of plastic components, electronics, motors, wires, rods, screws and nuts. Every piece is individually drafted in CAD, named with a part number, and assembled into documentation along with instructions on assembly to hand over to the manufacturer. Most people are surprised at how many pieces are in it and, when thinking about how a build is performed, it does seem like a lot. But once those 417 pieces are assembled together, it creates quite an amazing machine.”
How many different manufacturers do we source for components?
Allen: “We source from over 20 different manufacturers for all 417 components. When we were building the R1 +plus, we were sourcing from 25 different manufacturers. So the coordination of all the different suppliers was a difficult task — one that taught us a ton about supply chain management and helped us to organize a successful product from the ground up.”

How many injection molds do we have for the components?
Allen: “If you’re not familiar with them, injection molds are metal cylinders created for producing plastic parts. Material is fed into the heated barrel, forced into the mould cavity, where it cools and hardens. We have over 44 injection moulds for Robo R2 — 44 blocks of metal that we shoot plastic into to create the different variations in plastic components.”
How many prototypes did we make to get to this final model?
Allen: “Over a two-year period, we went through 19 different designs to get to the final look and feel. Before the final design direction, we had built over six different design variations and machines from scratch. For the R1 — our first 3D printer — we made our initial design and prototype with wood that we hand-shaped before we went into CNC prototyping. Once we had the final design direction for Robo R2, we created a total of seven prototypes: three hand-built prototypes, three CNC models of final design and two injection molded prototypes.”
How many trips have we made overseas to ensure the success of our product launches?
Allen: “We made more than 12 trips overseas since the start of the company in 2013, and have spent 138 days with a hands-on approach to all related assembly and design processes.”
How do we coordinate the assembly with the manufacturer?
Allen: “We have pilot builds, on-site Robo engineers, third-party quality control on incoming and outgoing parts, and system checks with the Robo OS software platform all coordinating their efforts and deliverables with many other Robo team members also working in unison.”
I hope this brings some insight into our processes at Robo. And we welcome any additional questions. Just comment below and we will be sure to answer them!
We can’t wait for you to bring Robo R2 into your home, workplace, classroom or anywhere else the making happens!